Have you ever wanted to remove a 'photo bomber' from your picture?
Using the Clone Stamp tool in Photoshop Elements, it's not that hard to remove a distracting person from a photo.
Watch this video to see how!
Want more step-by-step Photoshop Elements tutorials? Inside Mother's Little Helper, I'll show you how to:
- Make those older photos less cloudy and dusty
- Take a few years off - smooth out fine lines and wrinkles
- Tummy tuck - Get rid of the muffin top and bingo wings
- Make those pearly whites, well, whiter
- Give someone a good night's sleep - get rid of dark under eye circles
- Give those cheeks a touch of color - hand tint black and white photos
- Looking green? Restore natural color to your photos
How to Use the Clone Stamp Tool
Begin by saving the file as a Photoshop document. Go to File - Save As and choose PSD file. That means that you won't be saving over your original image. It also allows you to come back and edit your layers later.
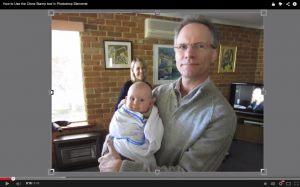
When you are using the clone stamp tool you don't want to clone a large area repeatedly. You wouldn't want to choose one brick and clone that same brick 6 times over.
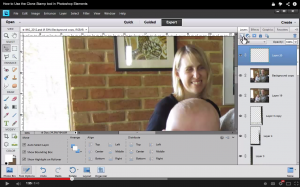
First, create a new layer by clicking the New Layer icon in the layers palette.
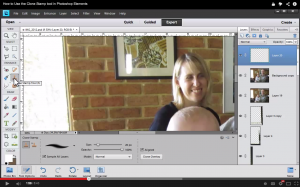
Select the Clone Stamp tool by pressing the S key or by clicking the Clone Stamp icon in the tool box on the left.
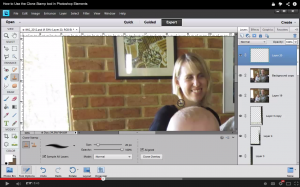
Alt Click on the area you want to start at, in this case at the bottom left of a brick. Then begin painting to copy the entire brick.
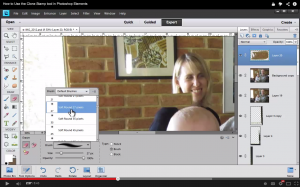
In this case I then chose the eraser tool with a soft round brush to erase some of the brick to reveal the brick below.
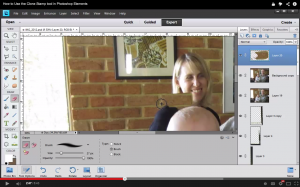
This allows a bit of the original brick to show and gives the painted brick a bit of a different look.
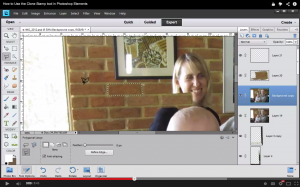
Another method would be to use the Polygonal Lasso tool. Simply click the corners to select an entire brick. Then press Ctrl J to copy the selection into a new layer.
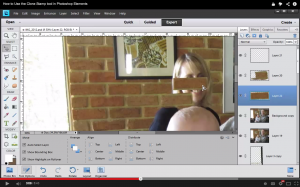
Now you can move the brick where you want it to go.
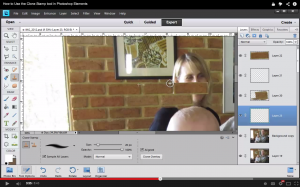
Once you have the brick placed, go back to the clone stamp tool to clone a bit of the mortar between bricks. Remember to Alt Click the area you want to clone, and then paint where you want it to go.
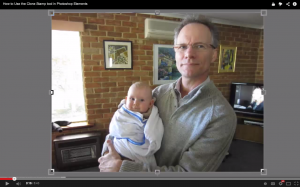
Now you have a beautiful image without a distracting person in the background.
Have you ever used the clone stamp tool to remove something from your photos? I’d love to see it, link me up in the comments!
I am an Amazon affiliate so may receive a commission if you make a purchase.

yes, but how did you handle the line between the child’s head and the bricks?
I made a quick selection of Edward’s head, and then erased any parts of new cloned layer that overlapped his head. So I did a rough clone, then went back and edited it. That’s why I set it up with multiple layers.
When you said “paint” or “erase” I had no idea what you were doing. Are you holding down a button on your mouse? Which one? When you say “alt/click” which button are you clicking? The right one seems to be for choosing a brush size. When I choose my clone tool it has already decided what I am going to be cloning and it’s not the area that I “alt/clicked.” I’m trying to clone out the dark areas in the bottom left and right to make it look more like he is standing on the deck of a boat instead of on a pedestal.
When you paint with with brush tool you are holding the mouse button and then dragging it along
When you erase you are using the eraser tool by are holding the mouse button and then dragging it along
Alt+click means hold down the alt button while you click to set the source (if you are on a mac you use the option button) for the cloning
So for that example:
1 Select the clone stamp tool
2 Hold down the alt/option key and click on the light section
3 Click and drag to paint the light area over the dark area
Personally, I’d try the healing brush as it could be simpler: http://www.digitalscrapbookinghq.com/abcs-pse-j/
I am using Elements 14 for editing trip pictures. Sometimes I make edits and it lets me save it as a JPEG file. Other times it wants me to save it as a Photoshop PSD file. I can change the file type and it will then let me then save it as a JPEG. What is the purpose/advantage of saving it as a PSD file? Is PSD an uncompressed file, unlike JPEG? Does it need to be a PSD file to work in the Organizer. Haven’t tried that yet. Thanks
Hi Bob
A PSD is a layered, uncompressed file, so you can go back and edit things later without starting from scratch. (I explain in more detail here: http://www.digitalscrapbookinghq.com/psd-file-type/)
I save all my edited photos as a PSD file, then if I want to print them or use them for other purposes, I will save as a JPEG file.
Organizer can view a large variety of file types, not just PSDs or Jpegs.
I hope this helps!
🙂 Melissa
I just came across this video. I learned a few things from it 🙂 I was hoping to see how you handled the picture frame on the wall. Unfortunately that bit wasn’t covered.
Hi Brian
For the frame, I simply extended it with the clone stamp tool in the same way.
I hope this helps.
Melissa