
- sleepless nights
- confusion about what we want to do
- guilt if we 'miss' a first
- blurry photos
- the paralysis of choice
- losing momentum on the project
- changing plans
There is Hope
There's the old story about how the first baby has a finished album with all the trimmings, and the third is lucky to have a small stack of photos.
But, thanks to digital scrapbooking, I'm here to tell you that baby number three in this house has the most up to date album yet!
Since I've just printed the first 10 months of my third baby's scrapbook (and Lucy turns one in June) and I have two completed albums on the shelf, I thought I'd share my best baby book tips with you.
Try an App
If you have an iPhone, the Project Life app may be the easiest way to get your baby's photos into a baby book. They have baby specific kits in the Project Life app. That way you don't need to learn any fancy software and you can order prints right from the app.
I have used both Obaby and the Project Life app to make scrapbooking about my little ones easy. For Lucy's baby album, I've mixed digital Project Life pages made in Photoshop Elements with ones straight from the App. (Yes, this is true!)
Decide on your Dates
I've done monthly pages for all three of my baby books with an extra couple of pages to cover their birth and the first birthday party. Would you believe that a lot of the time I spent on my first two baby books was trying to remember what dates I was using for each month?
Perhaps I'm easily confused, but it may help if you decide up front - is month 1 is newborn-1 month or starts at their 1st month 'birthday'?
This is especially important if you get a month or two behind. I ended up labeling my layouts with the date range just to help my own confusion.
For my books I chose to do monthly format with month up to the day of their month anniversary. So when Lucy turns one year old on the 18th of June, the photos on her 12 month layout are from the 19th of May to the 18th of June.
If you use Photoshop Elements Organizer you could create saved searches for each month. You can also use Smart Collections in Lightroom for a similar result.
Star Your Photos As You Shoot
When you take a photo on your phone that you love to add a star (or heart for iPhone) to make sure you remember to use them!
Choose a Kit
For all three baby books, I've chosen to use one kit throughout the book. Digital kits have a dozen or so background papers so that was enough variety for me to stay interested, but I dramatically cut down on the time it takes to create the pages.
Choose a Design
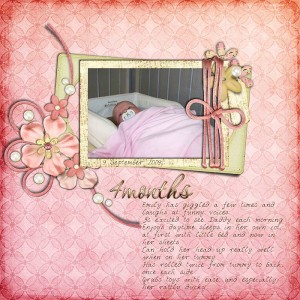
For Emily's album, I didn't have a set design as much as a few guidelines. I wanted just photos of her alone and plenty of journaling.
When Emily (now 6) was born I had been a digital scrapbooker for about 18 months. I enjoyed it and knew I wanted to create digital scrapbook pages for her baby album. I took a simple approach, working with premade quick pages for the first few months. Then I continued the album creating my own pages based on the pre-clustered frames (similar to these). Adding a paragraph of journaling, a title and background paper meant it was all done!
You can see a video walkthrough of Emily's printed book here.
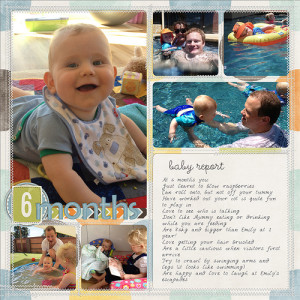
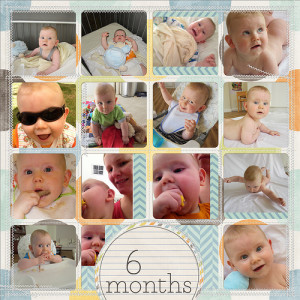
With Edward's album, I wanted more photos, so I chose to use Biograffiti's 12x12 baby book (no longer available). This had a double page layout each month and included 20+ photos. You can see Edward's finished book here.
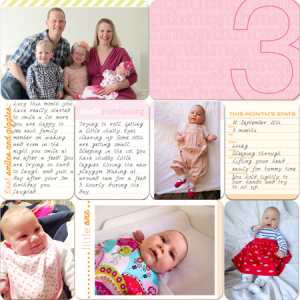
For Lucy's album, I cut back a little on the photos and continued to keep up the monthly journalling and have space for about 10 photos on double page.
Choose a Font
As you can tell, I'm all about making things easy on myself. For me, selecting one font (my own handwriting font) served me well for all three baby books. There's no decision making needed. I just use Melissa's hand 14pt on every layout.
Reuse Titles
If you are going with a more traditional digital scrapbook style album you can save time by reusing your titles. Once you have a title design you like you can copy and paste those layers into your next month's spread. In Emily's book I alternated between two alphas throughout the album. For Edward's book, I just changed up the embellishment cluster and alpha colour for the month numerals. I really liked saving the time on fiddling with the alphas!
Use Journaling Prompts
Sometimes it's hard to remember or think of things to write, so if you're looking for prompts to remember to record your baby's details here are a few ideas:
- Weight
- Length
- Clothes size
- Number of teeth
- Naps and sleep routine
- How baby gets around
- Things baby likes (favorite toy/activity)
- What baby eats
- Sounds baby makes
The Baby Edition of Digital Project life includes lots of prompts to help fill in the back-story of your baby with current events, about mom and dad, planning, pregnancy, birth and other prompt cards.
Use Social Media
Even if you've not been making notes throughout the month, if you regularly post on social media you are in luck! Use social media like Facebook or Instagram to help you remember when little events occurred. New teeth, new words and more. Just scroll through your timeline and see what prompts your memory.
I also liked using Words I Say app (no longer available) to record my little boy's words.
Get Printing Help
When it's all done, it's time to print! I love using Wendyzine's tips and her excellent photobook actions to turn my layouts in to photobooks. Make it easy on yourself and just select the right toolkit for the printing service you are using. Wendy has actions for all the popular sites.
Go and Create
Now it's time to pick up your camera and play with your supplies - there's nothing wrong with taking a few shortcuts on the way to a meaningful, beautiful album. With these tools in your kit, you can complete the iconic scrapbook - your baby's first year!

I am an Amazon affiliate so may receive a commission if you make a purchase.
Leave a Reply