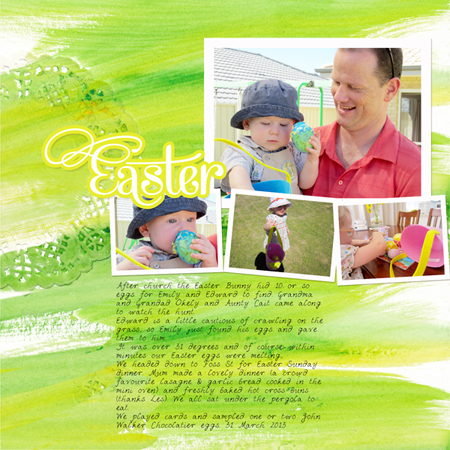
Today I'm sharing the layout I created for my little boy's first Easter.
Layout: Easter

Make it Yourself!
I created this page in my Digi Scrap from Scratch class
My first step was to select my photos and get them looking consistent.
- Collect the photos you want to use
- Arrange them on the page choosing the focal point photo
- Add inside stroke to the photos for an instant frame
- Find a mixed media paper background (or make one yourself!) and rotate or flip it to work with your photos
- Add a block of journalling
- Create the title with a font
- Add a stroke to the font using the color picker to match the color in your layout.
- Add shadows
Journaling
After church the Easter Bunny hid 10 or so eggs for Emily and Edward to find. Grandma and Grandad Okely and Aunty Cait came along to watch the hunt.
Edward is a little cautious of crawling on the grass, so Emily just found his eggs and gave them to him.
It was over 31 degrees and of course within minutes our Easter eggs were melting,.
We headed down to Foss St for Easter Sunday dinner. Mum made a lovely dinner (a crowd favourite lasagne & garlic bread cooked in the mini oven) and freshly baked hot cross buns (thanks Les). We all sat under the pergola to eat.
We played cards and sampled one or two John Walker Chocolatier eggs. 31 March 2013
Credits
 Make it Monday
Get more Easter inspiration from Alice in Scrapbook Wonderland who shows a creative way to add Easter eggs to a layout!
Care to Share?
I’d love to see what you are working on this week. Do you have a layout or two to share? You can add a picture to the comments below.
Happy Scrapping!

I am an Amazon affiliate so may receive a commission if you make a purchase.

Leave a Reply