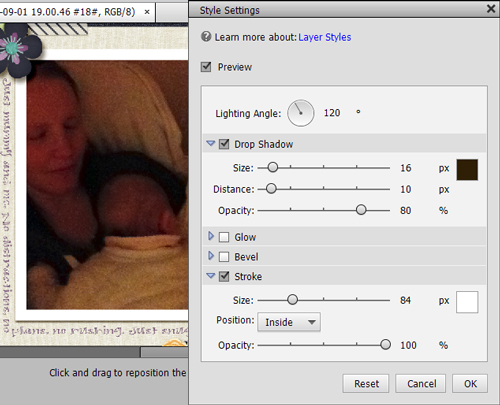
Want perfectly square borders for your photos? You can do it easily with Inner Stroke. In Photoshop Elements, there is a limited number of layer styles you can apply to your layers. Since the release of PSE13, you can add an inner stroke to any layer.
An inner stroke adds a border to your layer - as I've done in the layout below. It the perfect way to get a nice white line around each image on your layout.


In the Style Settings dialog for Layers, a new drop-down has been added for the position of the stroke. The options are: Outside, Inside, and Center.
How to Use Inner Stroke
- Select a layer, and in the Layer menu, click Layer Style - Style Settings.
- In the Style Settings dialog box, select Stroke, and then use the Position drop-down.
Adjust the size of the stroke to your liking and set the opacity to 100%. I prefer a white border but you could change the color of the border to anything you like.
Have an Earlier Version of PSE?
Do you have an earlier version of PSE? Don't worry you can achieve the same look with a product from Wendyzine.
One way or another you can have perfect borders around your photos. I love this look and use it on most of my layouts.
Happy Scrapping!

I am an Amazon affiliate so may receive a commission if you make a purchase.


Leave a Reply