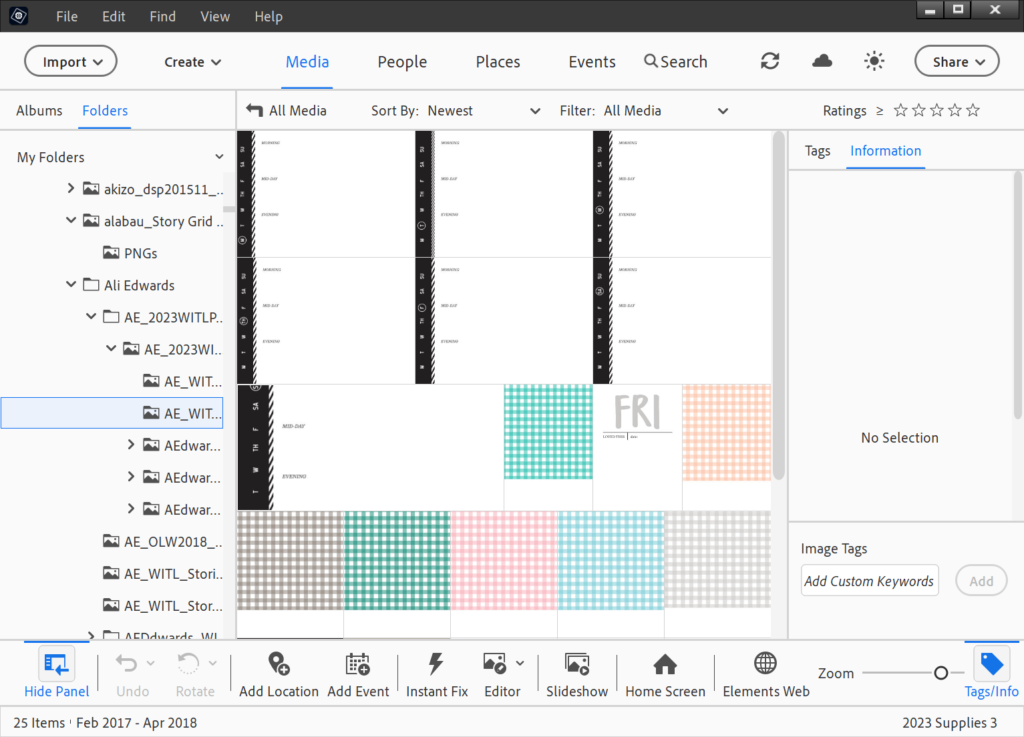
Sometimes, the Photoshop Elements backup feature just doesn't play nice! Today, I'm sharing how you can get all of your Photoshop Elements files and organizing across to a new PC. You definitely do not want to retag everything! And you won't have to either.
Adobe has cursory instructions on how to do this in their help, but here's the step by step with all my tips from 14+ years of using Organizer to make sure you don't miss anything. Please note, these instructions have only been tested on Mac to Mac or Windows to Windows upgrades.
The Problem: New Computer & the Backup and Restore Didn't Work
I have a question maybe you can help me with. I had to get a new computer. I loaded my PSE 2023 onto it and now I want to import all my digiscrap kits and embellishments and stuff with the tags and structure I have. I followed a video I found that you made about tagging and naming and organizing PSE Organizer. I LOVE it, and I don't want to lose it all. I followed the directions given by clicking on the Help in PSE Organizer, but it really didn't work.
I did a full backup onto an external hard drive
I brought the external hard drive with the backup on it to my new computer
I clicked File>Restore from Backup and first time I got all my digiscrap kits, but no tags and no structure
I deleted it all and tried again
I clicked File>Restore from Backup and this time I got the tags, but not the structure and only part of the kits.Any suggestions?
Rita F - Wyoming
Thank you in advance, and thank you for all your hard work helping all of us out here indulge in our passion of digital scrapbooking!
The Solution: Move Your Catalog and Files
What you could try is directly moving the catalog and files rather than using the backup. Here's how that would work.
1. Export your old tags as a hierarchy
You can export your tags using the save to file option on your old computer.
Go to Save Keyword Tags to File and Export All Keyword Tags. That way if you mess up and want to go back to the way things were you can!
Here's more detail on this step.
2. Write Metadata to files
Writing your metadata to your files is quite time consuming, but worthwhile if you want to be doubly sure you won't lose any of your tags.
File>Write Keyword Tag and Properties Info to Photos.
This set is a 'just in case' step, it's not essential, but if you have dated your scanned photos I wouldn't skip it.

3. Copy the Catalog Folder from Your Old Computer
You'll need to move the Catalog tofrom your old computer to your new one using a hard drive, here's my favourite 5Tb external hard drive on Amazon (I have the bigger sister - 14TB!).
1. Find your Catalog
Find your catalog here on Windows 10 & 11: C:\ProgramData\Adobe\Elements Organizer\Catalogs
Your catalog will be here on a Mac: /Users/[User Name]/Library/Application Support/Adobe/Elements Organizer/Catalogs
If you have Windows XP: C:\Documents and Settings\All Users\Application Data\Adobe\Photoshop Elements\Catalogs
Or you are digging them out from the dark ages of Windows Vista/7/8: C:\Program Data\Adobe\Photoshop Elements\Catalogs
2. Plug in your External Hard Drive
3. Copy and Paste the Catalogs Folder onto your new External Drive
Now you are ready for the next step!
4. Copy your digi supplies folder onto your EHD
You'll also need the original files to go to your new computer. The Catalog is just a thumbnail plus metadata, not an actual copy of the files. So:
- Create a new Digi Supplies on the EHD.
- Copy and Paste all of your supplies onto the EHD.
This might take a while, so grab a cup of tea! Now let's move over to your new computer.
5. Copy the catalogs onto your NEW Computer
There's a specific location that will allow Photoshop Elements Organizer to automatically find your catalogs.
Put your catalog here on Windows 10 & 11: C:\ProgramData\Adobe\Elements Organizer\Catalogs
Put your catalog will be here on a Mac: /Users/[User Name]/Library/Application Support/Adobe/Elements Organizer/Catalogs
Do not open Photoshop Elements Organizer at this point.
6. Copy your digi supplies folder onto your NEW Computer
I recommend putting the folder into the same location as you had it on the old computer as it will make it super quick to reconnect all the files.
Technically you can put it where ever you like and just tell Photoshop Elements the new location. I prefer to keep my supplies on my internal hard drive so that Organizer runs lightning fast.
7. Open PSE Organizer
If you have just installed Organizer, it will automatically make a new catalog and try to import photos from your default pictures folder. Click skip on the intro screen to skip this.
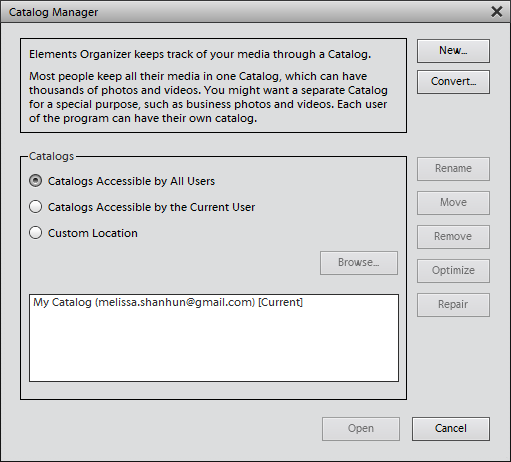
- Then, open up your new version of Photoshop Elements Organizer and select File - Manage Catalogs...

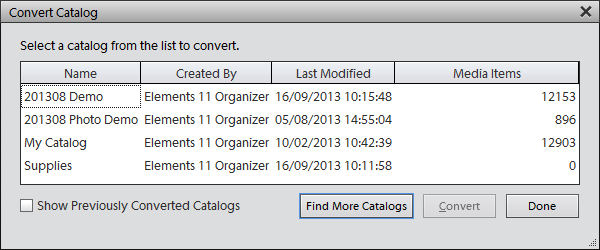
- Click Convert
- It will say loading for a while, then it will list all your older catalogs

- Click on the one that says it was created by your old version of PSE. If it doesn't show, check the box for Show Previously converted Catalogs.
- Click Convert.
- Then Photoshop Elements will do its thing, and will tell you the name for the catalog it just converted.
- When you get back to the Catalog manager choose the newly converted catalog, click open and voilà, NO RETAGGING!
The End Result
Now you get to enjoy your supplies and all your tags! I recently heard back from Rita and here's how she fared:
Thank you so much, Melissa, for your time and help!! I got it to work, finally!
Rita W
I hope this helps you make the most of your organizing. If you still need help, I have Zoom sessions available where I can walk you through the process.

PS Pin this for later!

I am an Amazon affiliate so may receive a commission if you make a purchase.


Leave a Reply