On the Digi Show Episode 111: It's Fabulous, there was some discussion over dragging and dropping files as smart objects in Photoshop.
In the comments, Jennifer Kellogg asks
I’m a new digi scrapper. I like to kit scrap. I’ve got PSE12.
What is the best way to use a kit? Open everything in the project bin? Or File > place each object from the folder?
The first page I did was a little frustrating (I was using File > Place) and it was tedious to go back to the folder each time I wanted to try a different paper, element, etc.
Suggestions?
Since version 7 of Photoshop Elements and the unpopular introduction of poorly implemented smart objects, Adobe has chopped and changed how you should go about dragging and dropping files into Photoshop Documents within Photoshop Elements.
Personally, a lot of the time I do use File - Place, as it's the easiest way to use smart objects in Photoshop Elements.
Using the place option adds your paper or embellishment as a smart object. This will not pixelate your image when you resize it. Pixelation is the blurry or jaggy look bitmaps get when resized. Usually, if you resize an item in Photoshop Elements, it will 'throw away' the excess pixels, and then when you resize it back up to its original size, you will not regain the details. Smart objects keep all the pixels, just in case you change your mind.
For most scrapbookers using Photoshop Elements 12, I would suggest the following method:
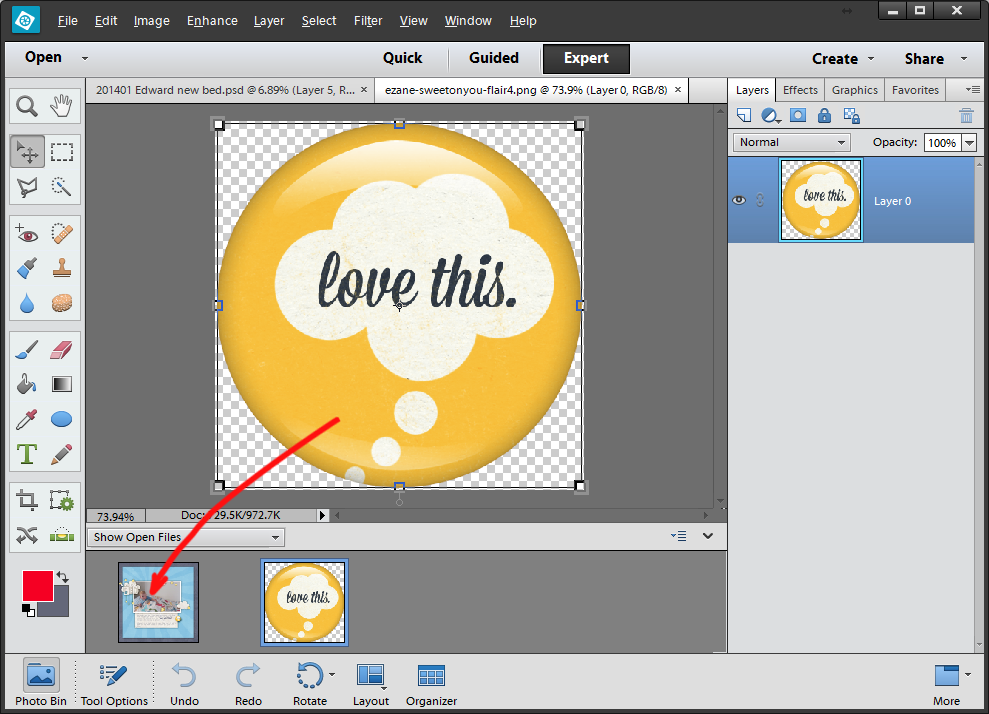
To add a paper or element to your layout, drag the file down from the main editing window onto your layout or template. That way your supplies will come in at full size. If you drag the file up from the Photo Bin in recent versions of Photoshop Elements it will be automatically resized, which is not what you want to happen.
Below, I've summarized the details of all the methods of dragging and dropping in Photoshop Elements.
What Happens when I:
Drag from Photo/Project Bin?
Photoshop Elements 6
new layer named same a file name (handy for credits!)
not smart object
resized to fit canvas – so sized down to 8.5×11
PSE7
new layer named same a file name
smart object
not resized to fit the canvas, there was a bug when you go back and transform the smart object it would loose its transparent background
PSE8-11
new layer named same a file name
not smart object
resized to fit the canvas – so sized down to 8.5×11
PSE12
new layer named same a file name
not smart object
resized to fill the canvas – sized up or down as required (very annoying in my book!)
PSE13
new layer named same a file name
smart object
resized to fill the canvas if too large
left at original size if smaller than canvas
PSE14+
new layer named same a file name
smart object
resized to fill the canvas if too large
left at original size if smaller than canvas
Drag from main editing window to Project/Photo bin in PSE
PSE6-13
new layer named same as layer name (eg Layer 0 for png files)
not smart object
not resized at all
PSE14
new layer named as Layer name
no smart object (unless you drag something that is already a smart object)
not resized to fit canvas
PSE15-PSE2018
new layer named as Layer name
smart object
not resized to fit canvas
PSE2019+
new layer named as Layer name
no smart object
not resized to fit canvas
Drag from floating window
From what I can tell this has always worked the same was from PSE6 onwards. If you drag from one window to another, it will drag the layer over (not as a smart object), and will not resize it at all.
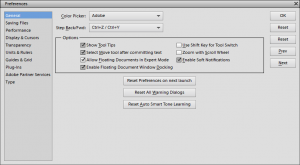
This works by default in PSE6-10, you simply select Window - Float All. In Photoshop Elements 11-13 you need to go to Edit, Preferences, General, Allow floating windows in Expert Mode to have this option.
PSE6-11
new layer named same as file name
smart object
resized to fit the canvas – so sized down
PSE12-13
new layer named as Layer X (depending on what layer number your file is up to)
no smart object
not resized to fit canvas
PSE14+
new layer named as existing Layer or file name
no smart object
not resized to fit canvas
Dragging up from an Album in the Photo Bin
PSE13-14
new layer named same a file name
not smart object
resized to fill the canvas – sized up or down as required (very annoying in my book!)
PSE15+
new layer named same a file name
smart object
not resized to fill the canvas
A note about Photoshop Elements 13+
When you drop a layer from the Photo bin, it will put it above the layer you release it over in the layers panel. It still puts the object directly in the middle of the destination file, regardless of where you click and drag it to from the Photo Bin. So it’s possible to drag a smaller file over an area that then puts it below a larger file in the center of your document. To send a layer to the front - just press Ctrl+Shift+] and it will go to the top of the layer stack.
Do you have dragging frustrations with Photoshop Elements?
Comment with your version number and problem and I'll see if I can give you a hand!
I am an Amazon affiliate so may receive a commission if you make a purchase.
About Melissa Shanhun
Melissa Shanhun is a Aussie mum of four and avid digital scrapbooker. She loves to show others how fun and easy it can be to record your precious memories with tech tools like Photoshop Elements.
Comments
Janet Bodet Carrsays
THANKS so much for this post!!! SUPER helpful!!! 🙂
Hi, I was unable to re-activate CM so bought Panstoria. However, I have just purchased an Apple Mac Air which is not compatible. Is it compatible with PSE?
Great post! I forgot the tip about dragging DOWN from the image window to the photo bin.
Keeping layers the original size is very helpful. I wish File>Place did that. Then we’d have the smart object AND the original size benefits.
***I have PSE 12 and dragging from a floating window yields the same results as version 13, not earlier versions. (I didn’t check out every other tip here, but noticed that variation from what you wrote here.)
In PSE13, File place keeps the original size – up to the size of the canvas. If your place object is bigger it’s proportionally resized to fit the canvas
*** Thanks for picking that up! I’ll make a note to update my post.
Helpful explanation. I just need to take a major chunk of time and read every post you’ve ever written… then maybe I could be comfortable and quicker. 🙂
I just had to upgrade to PSE 21 and when I drag a photo onto the screen and drop it, it puts it in some random layer, NOT above the one I have selected. This is extremely frustrating and time-consuming. Is there a way to change this? I had been using PSE 11 and it ALWAYS dropped things from the photo tray directly above the SELECTED layer. I am hating PSE 21.

THANKS so much for this post!!! SUPER helpful!!! 🙂
I notice you did not mention PSE11. Is it any different than PSE12?
Hi Joanne, I’ve updated the wording now 🙂 PSE11, did have some slight differences and I’ve noted them above.
Hope this helps!
Hi, I was unable to re-activate CM so bought Panstoria. However, I have just purchased an Apple Mac Air which is not compatible. Is it compatible with PSE?
Hi Diane, PSE is available for Mac 🙂 so it will work for you.
Great post! I forgot the tip about dragging DOWN from the image window to the photo bin.
Keeping layers the original size is very helpful. I wish File>Place did that. Then we’d have the smart object AND the original size benefits.
***I have PSE 12 and dragging from a floating window yields the same results as version 13, not earlier versions. (I didn’t check out every other tip here, but noticed that variation from what you wrote here.)
In PSE13, File place keeps the original size – up to the size of the canvas. If your place object is bigger it’s proportionally resized to fit the canvas
*** Thanks for picking that up! I’ll make a note to update my post.
Helpful explanation. I just need to take a major chunk of time and read every post you’ve ever written… then maybe I could be comfortable and quicker. 🙂
🙂 It will be here when you get to it! I’m glad they are helpful for you!
I just had to upgrade to PSE 21 and when I drag a photo onto the screen and drop it, it puts it in some random layer, NOT above the one I have selected. This is extremely frustrating and time-consuming. Is there a way to change this? I had been using PSE 11 and it ALWAYS dropped things from the photo tray directly above the SELECTED layer. I am hating PSE 21.
This is due to a feature added a few years ago. Wherever you drop the layer on the canvas it will be above that layer. I hope that helps