Do you love the idea of adding journaling, wordart and more to your photos?
Would you like to create your own Project Life cards?
There are a couple of basic techniques you can use to go from a plain photo to a fully fledged card with all the bells and whistles.
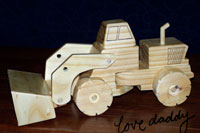
Putting text onto a photo
This is one digital technique all scrapbookers can learn and use, whether or not you are using Project Life.

- Open your photo in Photoshop Elements
- Click on File -Save As to save your photo as a Photoshop Document file. PSD files retain layers and can be edited later.
- Use to crop tool to select the size you want your photo to print at (3x4 or 4x6 for Project Life at 300dpi)

- Click on the type tool (AKA the text tool!)
- Click and drag to draw a text box
- Type your text
- Edit the colour/font etc as you wish
- Click the green tick
 (check mark) to apply the changes
 - Save your work!
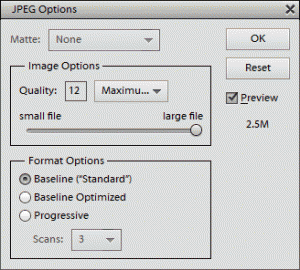
- Print at home via File - Print or File - Save as a high quality JPEG for online printing

I always recommend you save them as a PSD first, then edit and then save a new JPEG for printing or using in a layout. This also allows you to come back to the original if you ever need to.
Add Word Art to a Photo

Want to add some word art or a digital embellishment to your card? This is the process for you!
- Open your photo in Photoshop Elements
- Click on File -Save As to save your photo as a Photoshop Document file. PSD files retain layers and can be edited later.
- Use to crop tool to select the size you want your photo to print at (3x4 or 4x6 for Project Life at 300dpi)
- Click File - Place and browse to find your word art
- Move, rotate and resize the word art using the handles
- Click the green tick
 to apply the changes
 - Save your work!
- Print at home via File - Print or File - Save as a high quality JPEG for online printing

Create your own Project Life Card
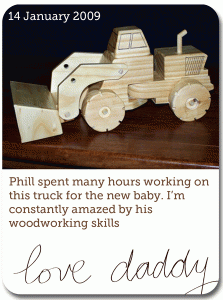
In this video I show you how you can create your own template for your card, with a spot for a photo and journalling
- Click File - New - Blank File ...
- Fill out the details to create a 3x4 inch 300 dpi card (or which ever size you'd like to create)

- Select the Shape tool
- Click and drag to create an area for your photo (I refer to this as a photo spot)
- Click on the type tool

- Click and drag to create an area for your journalling
- Click on File -Save As to save your photo as a Photoshop Document file. PSD files retain layers and can be edited later (you can use it again and again!).
Fill out your Card
- Open your PSD card and save it as a new name
- Click on the photo spot
- Click File - Place and browse to find your photo
- Move, rotate and resize the photo using the handles
- Use Ctrl+G or Command+G (or use the menu Layer - Create Clipping mask) to clip your photo into the photo spot
- Click the green tick
 to apply the changes
 - Click on the type tool

- Click in the journaling area to type your journaling
- Add word art if desired
- Save your work!
- Print at home via File - Print or File - Save as a high quality JPEG for online printing
Wish someone already did this for you? I have!
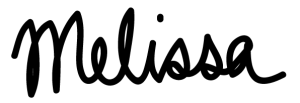
You can download my sample 3x4 card template and my love daddy word art to try yourself.
I'd love to hear your questions in the comments of this post, do you use Photoshop Elements to help you in your Project Life?

If you enjoyed this tutorial, you'll love Photo Editing for Absolute Beginners. This video course answers the most common questions that new Photoshop Elements users ask about cropping, printing and editing photos. Straight to the point, using the simplest method that will get you in and out of Photoshop Elements in a couple of minutes.
I am an Amazon affiliate so may receive a commission if you make a purchase.
I have, finally done a couple of 12×12 scrapbook pages from scratch, but never thought to use the same technique for PL cards! As always, you make it look easy.
🙂 Thanks Libby – it’s fun making our own cards