My best friend for scrapbooking is my keyboard. It saves me a lot of time and energy! But there's one specific keyboard shortcut I'm thinking of right now.
This is the shortcut that changed my life.
It literally shaved hours off my workflow.
I shared my favorite shortcuts in this post, but if you learn only one shortcut, make it this one.
Create Clipping Mask
But before I tell you more, let me explain exactly what a clipping mask is.
A clipping mask:
- makes the top layer 'clip' to the shape of the layer below it.
- hides (aka masks) any part of the top layer that is outside the pixels of the bottom layer.
- is a non-destructive edit, so the parts of your layer that aren't visible, are still there.
Why use the shortcut?
You may be superbly dexterous, but I spent ages trying to get my mouse exactly over the dividing line between the layers plus remember which key to hold down to show the clipping cursor. Then Adobe got rid of the lines between the layers!

You can also get to this command via Layer - Create Clipping Mask (or Release Clipping Mask)
Scrapper's Best Friend to the Rescue
In Photoshop Elements 14+ and Photoshop CC
Ctrl+G makes a group. But never fear, there's still a shortcut for you!
- Ctrl+Shift+G on Windows
- Cmd+Shift+G on a Mac
If you have an older version of Photoshop Elements (say v13 or older) there's a different shortcut for you.
- Windows: Ctrl+G
- Macintosh (does anyone still call them that?): Cmd+G
What you can do with a Clipping Mask
- Use a template! You can clip your papers and photos to the template.
- Create fun, textured text by clipping paper to a text layer.
- Fit a photo in a shape.
- Create your own embellishments or paper shapes.
- Create your own borders.
- Create artsy layouts with ease - simply clip your photo to a cool photomask, or brushed, semi-transparent layer.
Little Known Facts about the Clipping Mask
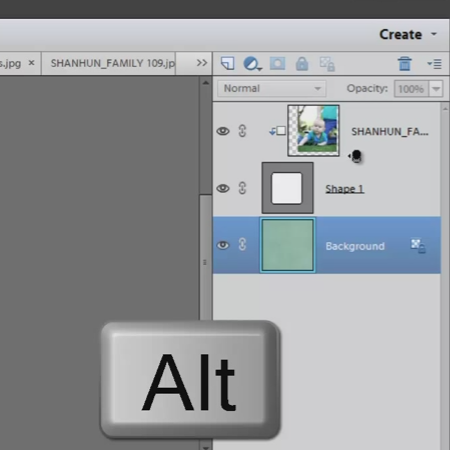
- Although it's called a mask, the clipping mask isn't shown as a mask in the Layers panel. Rather there's the layer thumbnail is indented and there's a bent arrow to show the relationship between the layer (see picture above).
- If you (for example) have clipped a photo to a small photo spot and then move it, you'll be moving the photo layer within the photo spot. Group your layers to avoid this (You can group layers by shift-clicking on the layers in the layers panel, then clicking the chain icon).
- You need to apply layer styles such as shadows to the bottom-most layer (the one you clipped to).
So there you have it. More than you ever wanted to know about clipping masks.
Now, you can go out there and scrap faster than ever!

I am an Amazon affiliate so may receive a commission if you make a purchase.
Leave a Reply