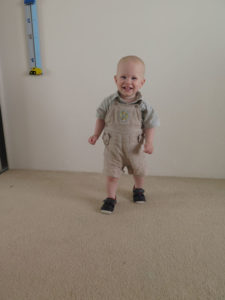
It's cute but a bit dark with some distractions in the background.
You know that familiar feeling when you look at your photos? The one where you think they really could look a lot better? Well, I'm here with some simple photo edits that can make your everyday snapshots look their best.
Let's start with the basics...
To start with editing a photo from within Photoshop Elements Organiser:
- Right click on the photo in the Organizer and select Edit in Photoshop Elements Editor
- Save the File as... a PSD (Photoshop Elements document)
- Right click on the Background layer in the Layers Panel on the right and select duplicate layer
This way your original photo is safe and sound
Then go to the Adjustment panel and play with the sliders.
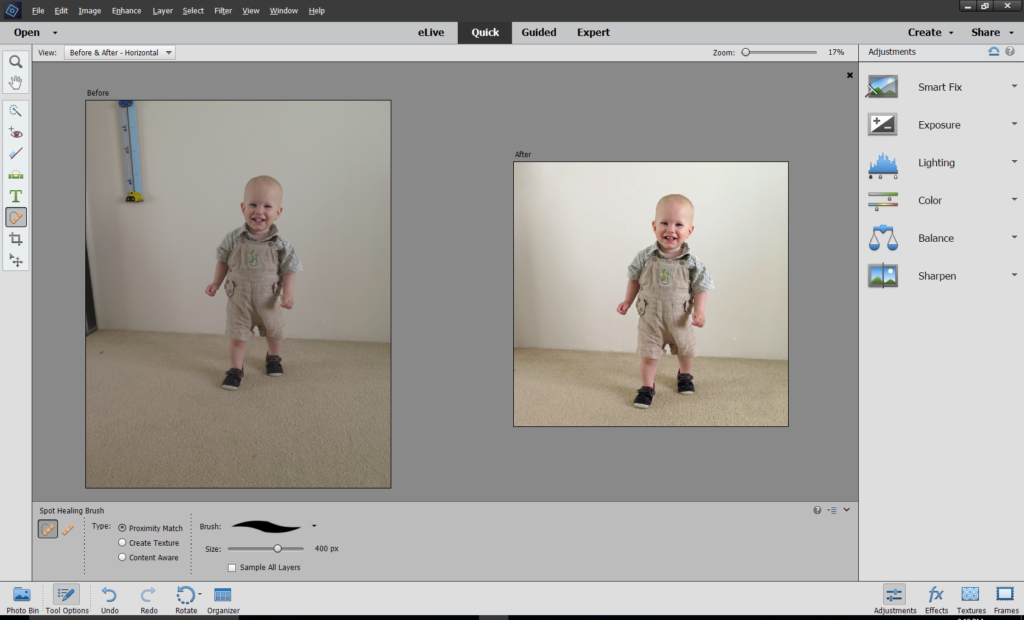
Three steps is all I need!
My favourites are:
- Smart Fix (just click auto!)
- Using the crop tool

- Smart healing brush

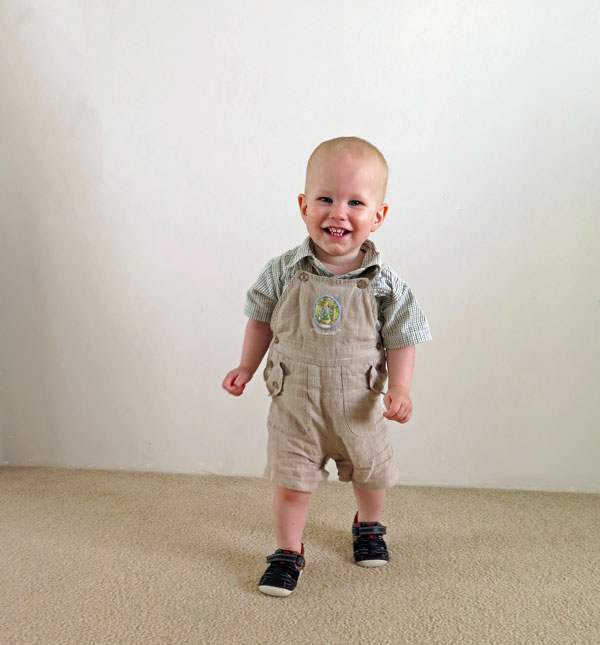
After! My bright happy boy without the distractions
 You can learn more about Quick Edits in my Fast Photo Fixes class.
I'd love to help you tackle your photo problems, leave a comment below and I'll answer them in an upcoming article.

PS If you want to improve the look of a batch of photos, check out how to edit photos in Photoshop Elements Organizer here.
See my favourite things in the Digi Scrap HQ Store at Amazon.
I am an Amazon affiliate so may receive a commission if you make a purchase.
Leave a Reply